Category: Uncategorized
Mini Pepper Poppers
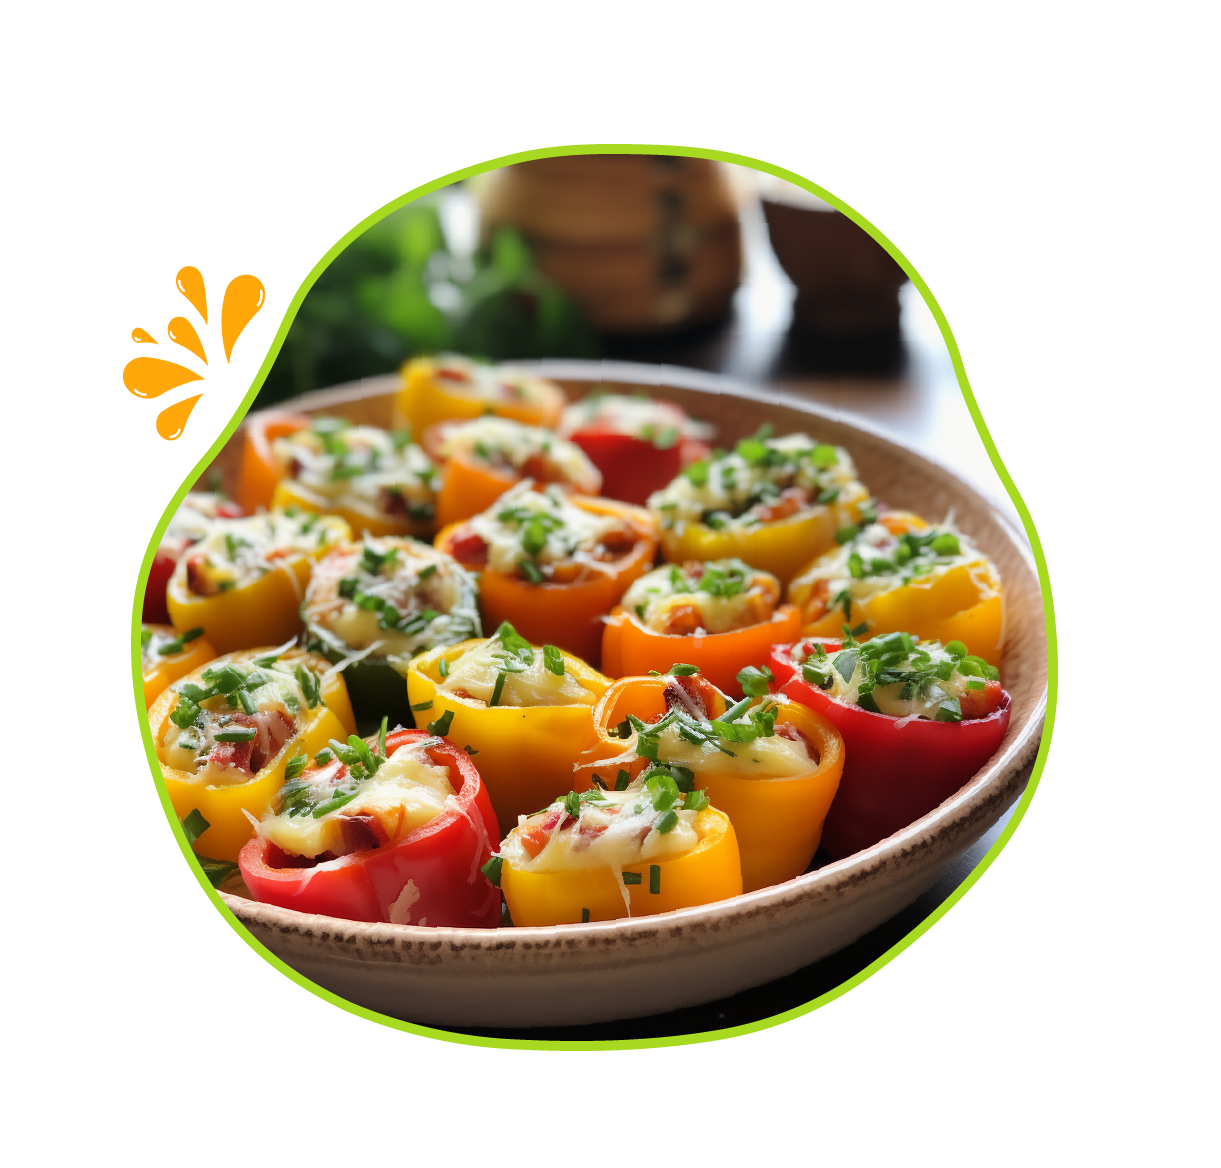


Mini Pepper Poppers are the ultimate party appetizer, featuring bite-sized mini peppers generously filled with a decadent mixture of creamy cream cheese, sharp cheddar cheese, and crispy bacon bits. Baked until they’re warm and the cheese is delightfully gooey, these poppers are a crowd-pleaser that disappears in seconds.
SERVINGS
12-6 Poppers
PREP TIME
10 Mins
COOK TIME
15-20 Mins
INGREDIENTS
12-16 Perpetual™ mini peppers, assorted colors
4 oz cream cheese, softened
1/2 cup sharp cheddar cheese, shredded
1/4 cup cooked bacon bits (about 4 slices)
Salt and pepper to taste
Chopped fresh chives for garnish (optional)
RECIPE NOTES
Customize your poppers by adding diced jalapeños for some heat or chopped fresh herbs for extra freshness.
COOKING TIPS
You can use a piping bag to easily fill the mini peppers with the cheese mixture for a neater presentation.
PRESENTATION
Serve the Mini Pepper Poppers on a platter, garnished with chopped fresh chives, for an appetizing and inviting display.
NUTRITIONAL INFO
Per serving:
Calories: 60
Fat: 5g
Protein: 2g
Carbohydrates: 2g
Fiber: 0g
DIRECTIONS
- Preheat your oven to 375°F (190°C).
- Start by preparing the mini peppers. Cut off the tops, remove the seeds and membranes, and rinse them thoroughly.
- In a mixing bowl, combine the softened cream cheese, shredded cheddar cheese, and cooked bacon bits. Mix until all the ingredients are well incorporated. Season with a pinch of salt and pepper to taste.
- Carefully fill each mini pepper with the cheese and bacon mixture, ensuring they are generously stuffed.
- Arrange the filled Mini Pepper Poppers on a baking sheet or in a baking dish.
- Bake in the preheated oven for 15-20 minutes or until the peppers are tender, and the cheese is bubbly and golden.
- Remove from the oven and let them cool slightly before serving.
- If desired, garnish the Mini Pepper Poppers with chopped fresh chives for a burst of color and flavor.
EXPLORE MORE RECIPES
PERPETUAL GOODNESS, PACKED WITH FLAVOUR.
Bell Pepper and Feta Salad
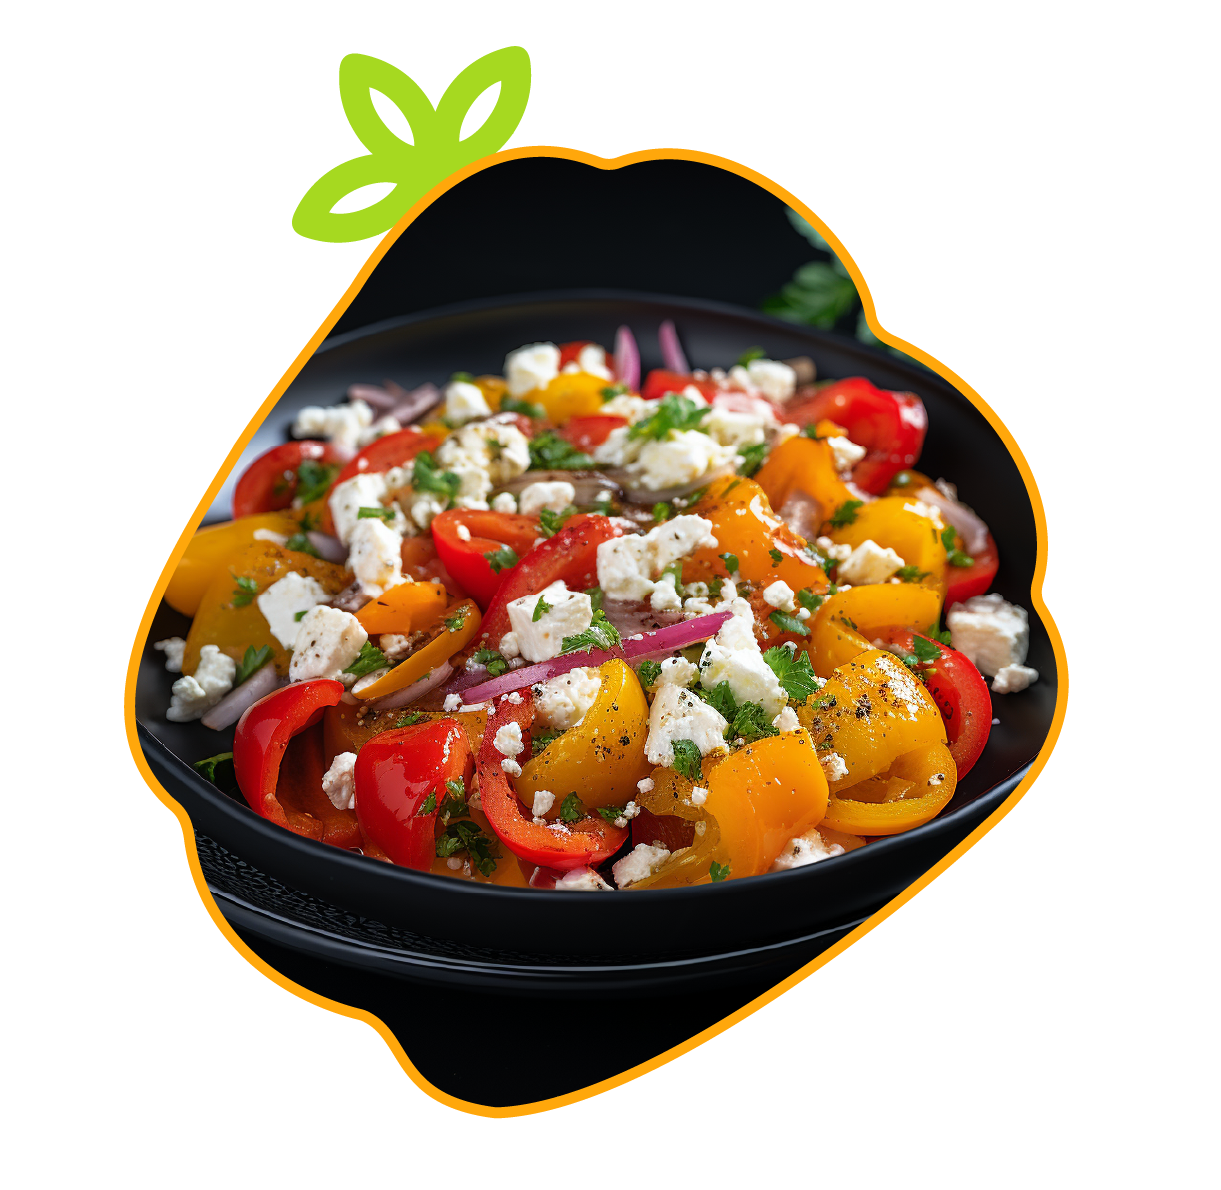


Transport your taste buds to the Mediterranean with Bell Pepper and Feta Salad. This refreshing and vibrant salad combines the crispness of bites of bell peppers with the creaminess of crumbled feta cheese, the brininess of Kalamata olives, the sweetness of cherry tomatoes, the zing of red onion, and the freshness of aromatic herbs. A drizzle of lemon and olive oil dressing ties it all together for a burst of Mediterranean-inspired flavors.
SERVINGS
4
PREP TIME
15 Mins
COOK TIME
0 Mins
INGREDIENTS
2 large Perpetual™ bell peppers (red, green, or yellow), chop
1 cup crumbled feta cheese
1/2 cup Kalamata olives, pitted and sliced
1 cup cherry tomatoes, halved
1/2 red onion, thinly sliced
Fresh herbs (e.g., basil, mint, or parsley), chopped
Zest and juice of 1 lemon
3 tablespoons extra-virgin olive oil
Salt and pepper to taste
RECIPE NOTES
This salad pairs wonderfully with grilled chicken, shrimp, or a piece of crusty bread.
COOKING TIPS
Customize your salad by adding other Mediterranean ingredients like cucumber, artichoke hearts, or roasted red peppers.
PRESENTATION
Present the Bell Pepper and Feta Salad in a large salad bowl, garnished with a few extra fresh herb leaves and lemon zest for a vibrant and appealing presentation.
NUTRITIONAL INFO
Per serving:
Calories: 220
Fat: 16g
Protein: 6g
Carbohydrates: 14g
Fiber: 4g
DIRECTIONS
- In a large salad bowl, combine the chopped bell peppers, crumbled feta cheese, Kalamata olives, cherry tomatoes, and thinly sliced red onion.
- Sprinkle the fresh herbs over the top for added flavor and freshness.
- In a small bowl, whisk together the lemon zest, lemon juice, extra-virgin olive oil, salt, and pepper to create the dressing.
- Drizzle the dressing over the salad.
- Toss gently to coat all the ingredients with the dressing.
- Taste and adjust the seasoning if needed.
- Let the salad sit for a few minutes to allow the flavors to meld.
- Serve the Bell Pepper and Feta Salad as a refreshing side dish or a light and healthy lunch.
EXPLORE MORE RECIPES
PERPETUAL GOODNESS, PACKED WITH FLAVOUR.
Mini Cucumber Tzatziki
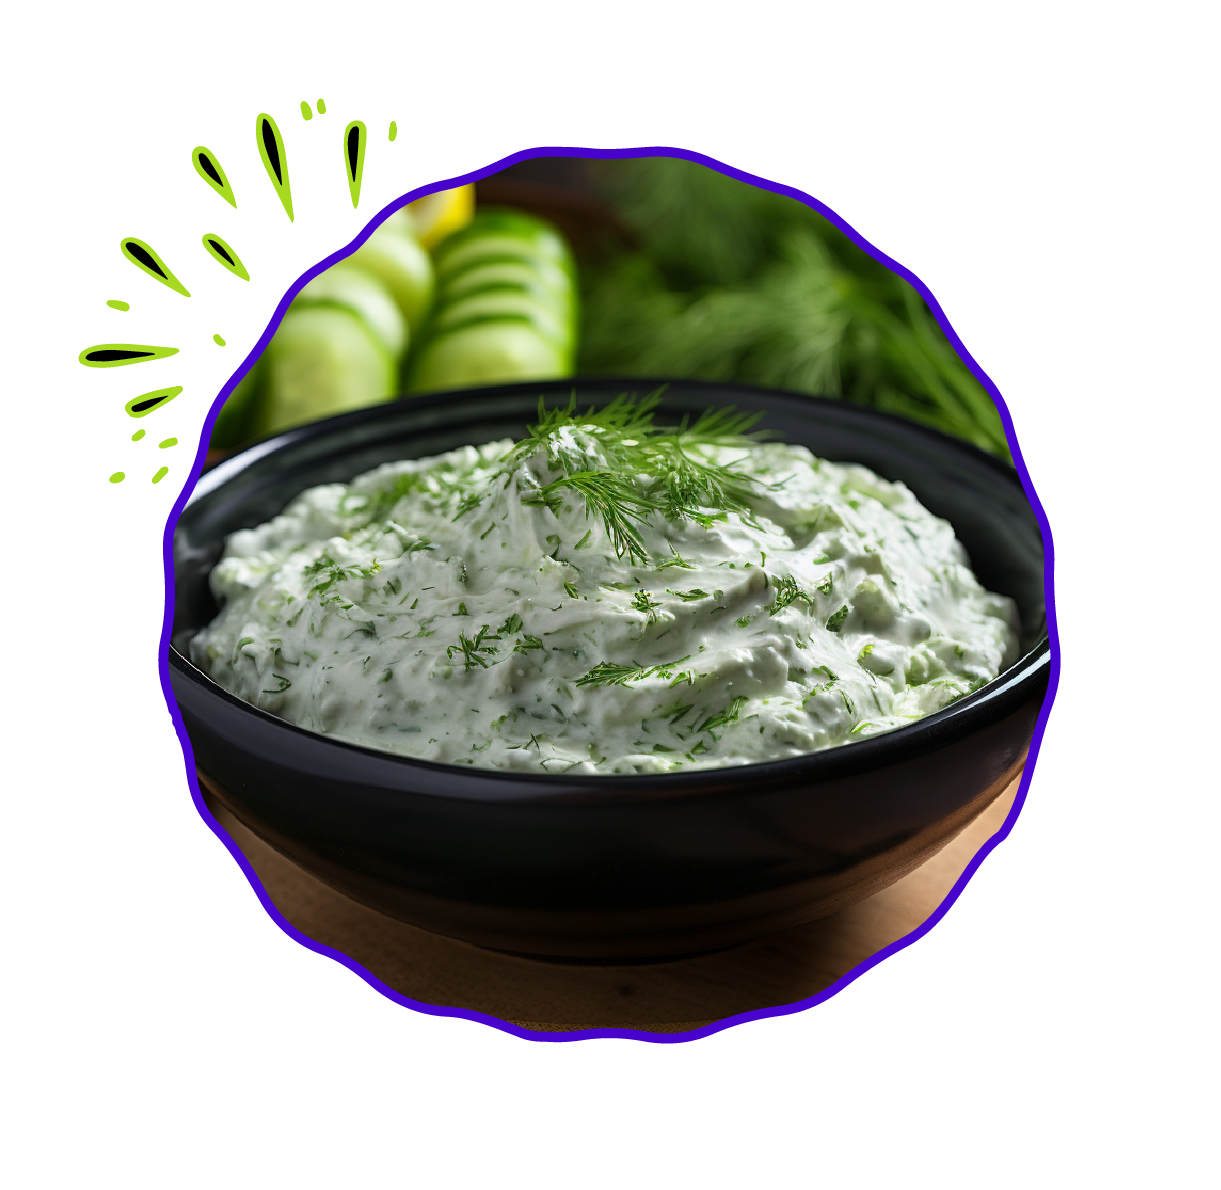


Experience the bright and tangy flavors of Mini Cucumber Tzatziki, a delightful Greek-inspired sauce that combines freshly grated mini cucumbers with creamy Greek yogurt, zesty garlic, a squeeze of lemon juice, and the freshness of dill. This homemade tzatziki is the perfect accompaniment to grilled meats, pita bread, or as a refreshing dip for veggies.
SERVINGS
About 2 Cups
PREP TIME
30 Mins
COOK TIME
0 Mins
INGREDIENTS
4-6 Perpetual™ mini cucumbers, grated
1 1/2 cups Greek yogurt
2 cloves garlic, minced
Juice of 1 lemon
2 tablespoons fresh dill, chopped
Salt and pepper to taste
Extra dill and cucumber slices for garnish (optional)
RECIPE NOTES
For a smoother texture, you can blend the tzatziki mixture in a food processor for a few seconds.
COOKING TIPS
For a smoother texture, you can blend the tzatziki mixture in a food processor for a few seconds.
PRESENTATION
Present the Mini Cucumber Tzatziki in a serving bowl, garnished with a sprig of fresh dill and a few neatly arranged cucumber slices for an inviting and visually appealing presentation.
NUTRITIONAL INFO
Per 1/4 cup serving:
Calories: 40
Fat: 1g
Protein: 3g
Carbohydrates: 6g
Fiber: 1g
DIRECTIONS
- Start by grating the mini cucumbers. You can leave the skin on for added texture and color.
- Place the grated cucumbers in a fine-mesh strainer over a bowl and sprinkle them with a pinch of salt. Allow them to drain for about 15-20 minutes to remove excess moisture. Gently squeeze out any remaining liquid.
- In a mixing bowl, combine the drained grated cucumbers, Greek yogurt, minced garlic, freshly squeezed lemon juice, and chopped fresh dill.
- Stir the mixture until all the ingredients are well incorporated.
- Taste the Mini Cucumber Tzatziki and adjust the seasoning with salt and pepper to your liking. You can also add more lemon juice or garlic for extra zest.
- Transfer the tzatziki to a serving bowl.
- Garnish with a sprig of fresh dill and a few thin cucumber slices for a touch of freshness.
EXPLORE MORE RECIPES
PERPETUAL GOODNESS, PACKED WITH FLAVOUR.
Cucumber Noodles with Thai Peanut Sauce
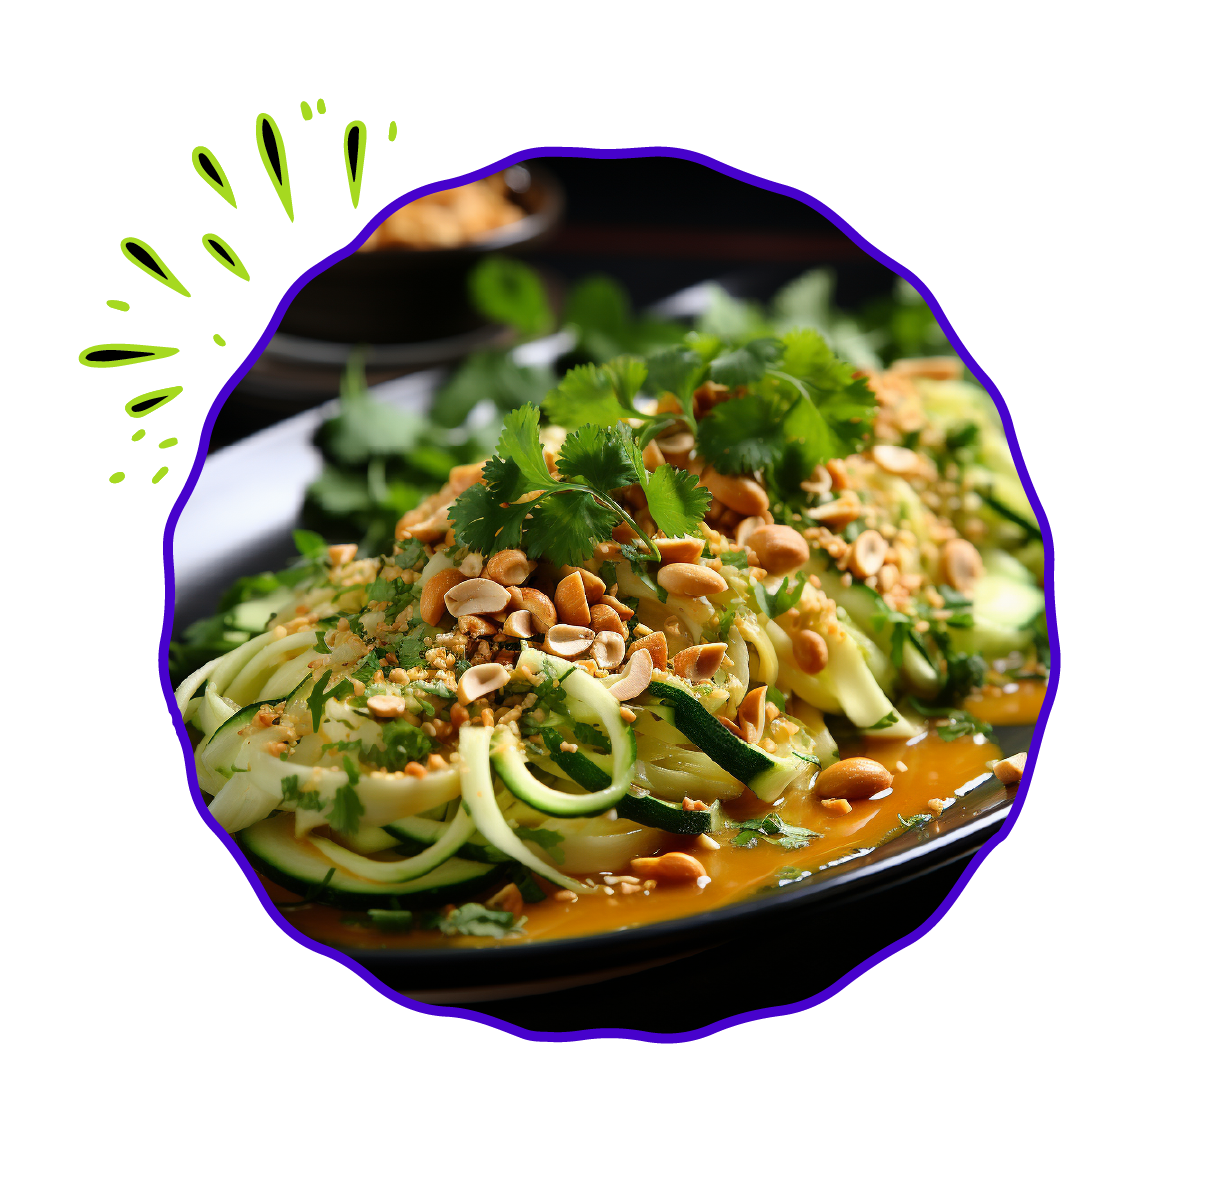


This refreshing and vibrant dish takes the concept of noodles to a whole new level by replacing traditional pasta with crisp and cool cucumber noodles. Drizzled with a creamy and zesty Thai peanut sauce, this recipe is a delightful blend of flavors and textures that’s perfect for a light and healthy meal.
SERVINGS
4
PREP TIME
20 Mins
COOK TIME
5-10 Mins
INGREDIENTS
2 Perpetual™ long english cucumbers, spiralized into noodles
1/2 cup smooth peanut butter
3 tablespoons soy sauce
2 tablespoons lime juice
2 tablespoons honey
1 tablespoon sesame oil
2 cloves garlic, minced
1 teaspoon grated ginger
1/4 teaspoon red pepper flakes (adjust to taste)
Chopped peanuts and fresh cilantro for garnish
RECIPE NOTES
Feel free to get creative with your garnishes. Sliced red bell peppers, shredded carrots, or even a sprinkle of toasted sesame seeds can add extra texture and flavor to this dish.
COOKING TIPS
You can customize this dish by adding protein such as grilled chicken, shrimp, or tofu. Adjust the red pepper flakes to control the level of spiciness to your liking.
PRESENTATION
Serve the cucumber noodles in individual bowls or on a platter, garnished with an extra sprinkle of chopped peanuts and a few fresh cilantro leaves for a burst of color and flavor.
NUTRITIONAL INFO
Per serving:
Calories: 280
Fat: 19g
Protein: 7g
Carbohydrates: 21g
Fiber: 3g
DIRECTIONS
- In a mixing bowl, whisk together peanut butter, soy sauce, lime juice, honey, sesame oil, minced garlic, grated ginger, and red pepper flakes. Taste and adjust the seasoning if needed. Set aside.
- Spiralize the long English cucumbers into noodles using a spiralizer. Place them in a large serving bowl.
- Pour the prepared Thai peanut sauce over the cucumber noodles. Toss well to coat the noodles evenly with the sauce.
- Allow the flavors to meld for a few minutes in the refrigerator.
- When ready to serve, garnish the cucumber noodles with chopped peanuts and fresh cilantro.
EXPLORE MORE RECIPES
PERPETUAL GOODNESS, PACKED WITH FLAVOUR.
Cucumber Kimchi
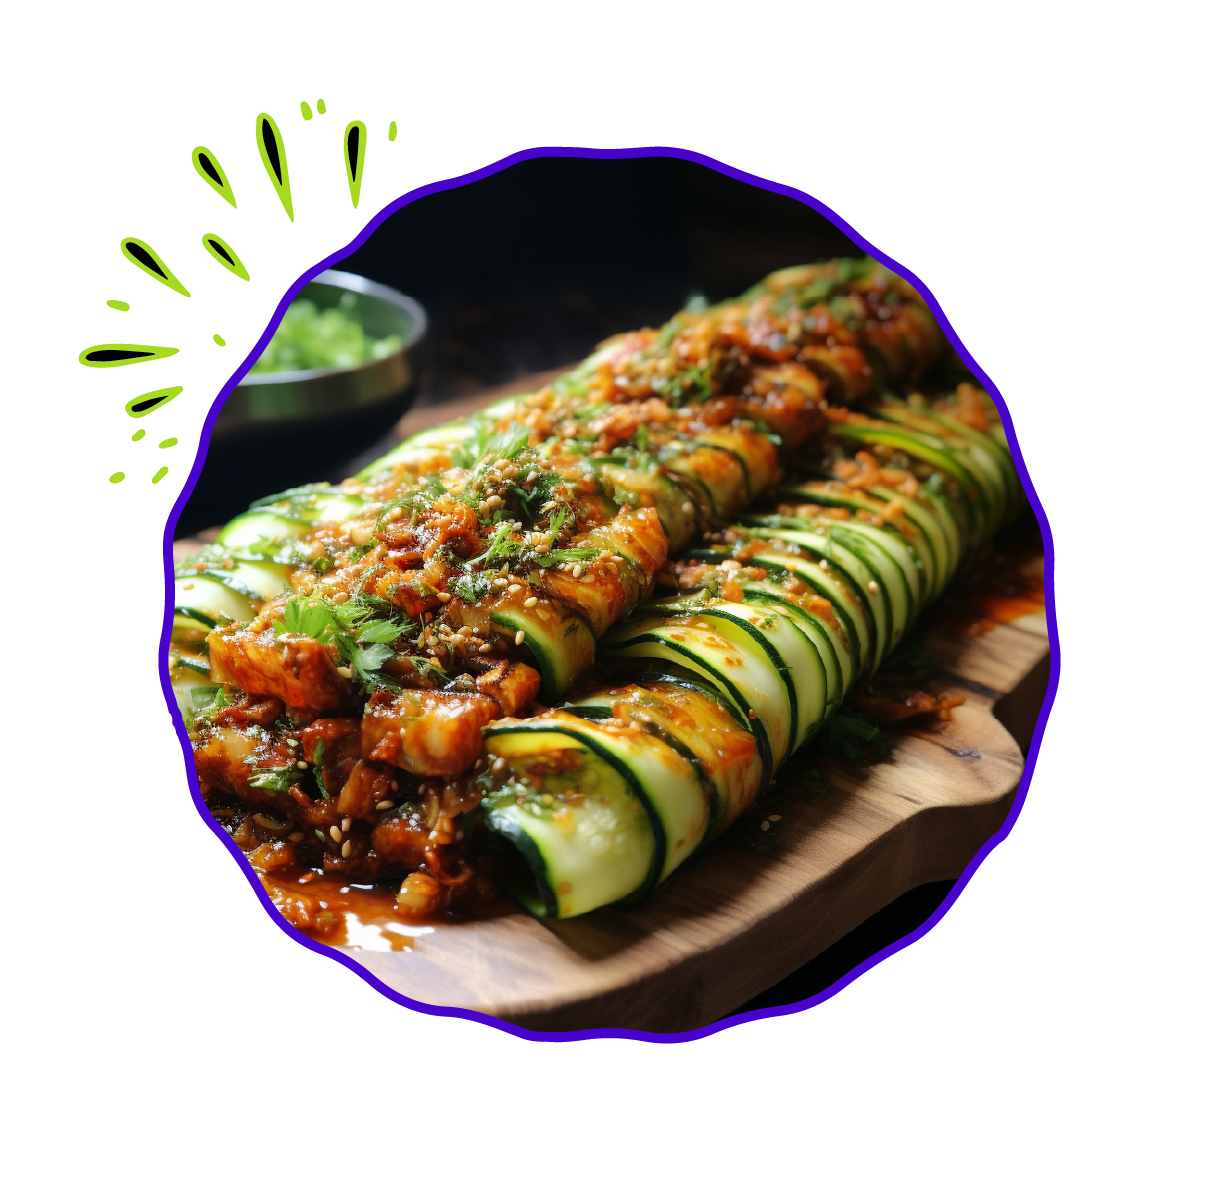


Dive into the world of Korean flavors with Cucumber Kimchi, a unique and spicy side dish that’s sure to awaken your taste buds. This homemade kimchi features long cucumber slices fermented with a tantalizing blend of garlic, ginger, red pepper flakes, and fish sauce, resulting in a crave-worthy and versatile condiment that can elevate your meals or serve as a delightful snack.
SERVINGS
Varies on Cucumber Quantity
PREP TIME
45 Mins
COOK TIME
24-48 Hours
INGREDIENTS
4-6 Perpetual™ long english cucumbers
4 cloves garlic, minced
1-inch piece of fresh ginger, minced
2 tablespoons red pepper flakes (adjust to taste)
2 tablespoons fish sauce (or soy sauce for a vegetarian version)
1 tablespoon sugar
1 green onion, chopped
1 tablespoon sesame seeds (optional)
Salt for salting cucumbers
RECIPE NOTES
Feel free to customize your Cucumber Kimchi by adding shredded carrots, daikon radish, or other vegetables of your choice.
COOKING TIPS
Cucumber Kimchi can be enjoyed immediately, but its flavors develop and intensify over time, so it’s worth letting it ferment for a day or two.
PRESENTATION
Serve the Cucumber Kimchi in a small dish or as a topping for rice bowls, garnished with sesame seeds and additional chopped green onion for added flavor and visual appeal.
NUTRITIONAL INFO
Per serving:
Calories: 30
Fat: 1g
Protein: 1g
Carbohydrates: 5g
Fiber: 2g
Sugar: 2g
DIRECTIONS
- Start by preparing the cucumbers. Wash them and cut off the ends. Slice the cucumbers into quarters lengthwise.
- In a large bowl, generously sprinkle the cucumber slices with salt. Toss to coat them evenly. Allow them to sit for about 30 minutes to draw out excess moisture. Rinse and drain the cucumbers thoroughly after this time.
- In a separate bowl, combine the minced garlic, minced ginger, red pepper flakes, fish sauce, and sugar to create the kimchi paste. Adjust the red pepper flakes to achieve your desired level of spiciness.
- Pat the cucumber slices dry with a paper towel.
- Add the cucumber slices to the kimchi paste, along with the chopped green onion.
- Gently mix everything together, ensuring that the cucumber slices are well coated with the kimchi paste.
- Transfer the Cucumber Kimchi into a clean, airtight jar or container.
- Press down on the cucumbers to remove any air bubbles and to compact them in the container.
- Seal the container and let it ferment at room temperature for 24-48 hours, depending on your preferred level of fermentation. Burp the container occasionally to release excess gas.
- Once fermented to your liking, store the Cucumber Kimchi in the refrigerator to slow down the fermentation process.
EXPLORE MORE RECIPES
PERPETUAL GOODNESS, PACKED WITH FLAVOUR.
Cucumber and Smoked Salmon Rolls
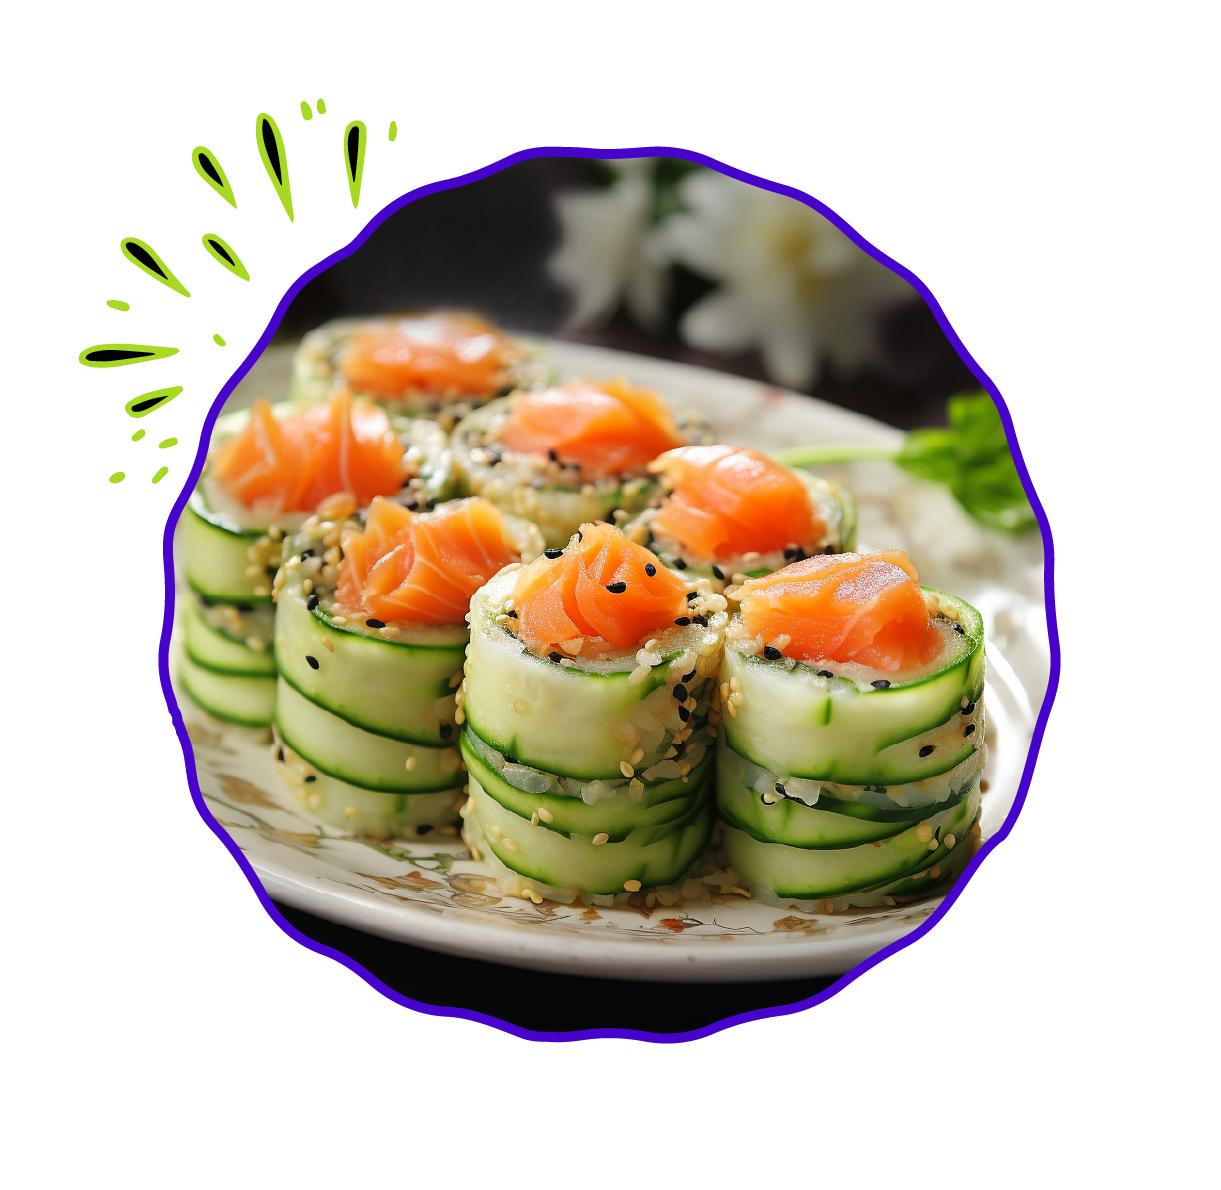


Impress your guests with Cucumber and Smoked Salmon Rolls, an elegant appetizer that’s as beautiful as it is delicious. Thin slices of cucumber are delicately rolled around velvety smoked salmon, creamy cream cheese, and fragrant fresh dill, creating a stunning and flavorful bite-sized treat.
SERVINGS
12 Rolls
PREP TIME
20 Mins
COOK TIME
0 Mins
INGREDIENTS
2 large Perpetual™ long english cucumbers
4 oz smoked salmon
4 oz cream cheese, softened
Fresh dill sprigs
Toothpicks for securing rolls
RECIPE NOTES
Get creative with your fillings by adding capers, thinly sliced red onion, or a sprinkle of black pepper or salt.
COOKING TIPS
You can also add a squeeze of fresh lemon juice for a zesty twist and ginger, wasabi, and soy to taste.
PRESENTATION
Present the Cucumber and Smoked Salmon Rolls on a stylish serving platter, garnished with dill sprigs for an elegant and inviting display.
NUTRITIONAL INFO
Per serving:
Calories: 110
Fat: 8g
Protein: 5g
Carbohydrates: 3g
Fiber: 1g
DIRECTIONS
- Start by preparing the cucumbers. Wash them thoroughly and trim off the ends. Using a vegetable peeler or a mandoline slicer, thinly slice the cucumbers lengthwise into long strips.
- Lay out the cucumber slices on a clean surface.
- Spread a thin layer of softened cream cheese on each cucumber slice.
- Place a slice of smoked salmon on top of the cream cheese.
- Add a sprig of fresh dill on top of the salmon.
- Carefully roll up each cucumber slice, securing it with a toothpick to keep the roll in place.
- Repeat this process until all cucumber and smoked salmon slices are used.
- Arrange the Cucumber and Smoked Salmon Rolls on a serving platter.
- Garnish with extra dill sprigs for a touch of freshness.
EXPLORE MORE RECIPES
PERPETUAL GOODNESS, PACKED WITH FLAVOUR.
Cucumber and Mint Sorbet


Beat the summer heat with Cucumber and Mint Sorbet, a refreshing and vibrant dessert that combines the coolness of cucumber with the invigorating aroma of fresh mint, a hint of sweetness from sugar, and a zing of lime juice. This homemade sorbet is the perfect way to cool down on hot summer days.
SERVINGS
4
PREP TIME
40 Mins
CHILL TIME
2 Hours
INGREDIENTS
2 large Perpetual™ long english cucumbers, peeled
1/2 cup fresh mint leaves
1/2 cup granulated sugar (adjust to taste)
Juice and zest of 2 limes
1/4 cup water
RECIPE NOTES
Feel free to experiment with other fresh herbs like basil or cilantro for different flavor profiles.
COOKING TIPS
If you don’t have an ice cream maker, you can pour the mixture into a shallow container, freeze it, and stir it every 30 minutes until it reaches the desired sorbet consistency.
PRESENTATION
Present the Cucumber and Mint Sorbet in chilled dessert glasses or bowls, garnished with a sprig of fresh mint or a thin cucumber slice for a visually appealing touch.
NUTRITIONAL INFO
Per serving:
Calories: 120
Fat: 0g
Protein: 1g
Carbohydrates: 31g
Fiber: 2g
Sugar: 12g
DIRECTIONS
- Begin by preparing the cucumbers. Peel them and cut them into chunks.
- In a food processor or blender, combine the cucumber chunks, fresh mint leaves, granulated sugar, lime juice, lime zest, and water.
- Blend until you have a smooth mixture.
- Taste the mixture and adjust the sweetness or tartness by adding more sugar or lime juice if desired.
- Pour the mixture into an ice cream maker and churn according to the manufacturer’s instructions until it reaches a sorbet-like consistency. This typically takes about 20-30 minutes.
- Transfer the sorbet to an airtight container and freeze for an additional 2 hours or until firm.
- When ready to serve, scoop the Cucumber and Mint Sorbet into bowls or glasses.
- Garnish with a sprig of fresh mint or a thin cucumber slice for a touch of elegance.
EXPLORE MORE RECIPES
PERPETUAL GOODNESS, PACKED WITH FLAVOUR.
Cucumber and Avocado Gazpacho
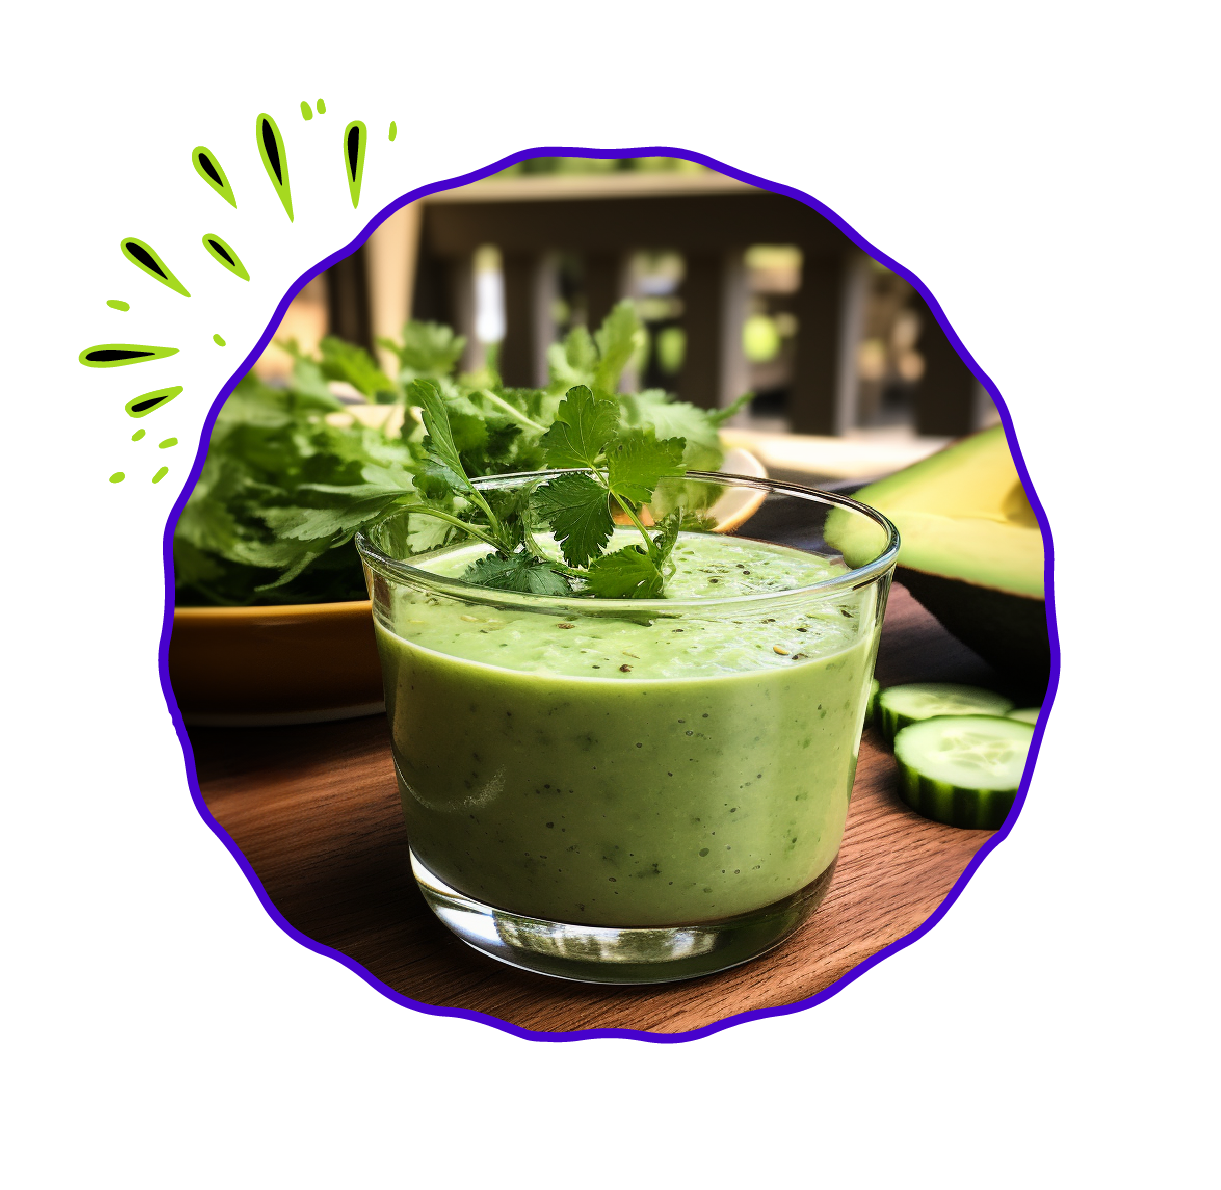


Cool, creamy, and bursting with flavor, Cucumber and Avocado Gazpacho is the perfect chilled soup for warm days. This refreshing gazpacho combines the crispness of cucumbers with the creaminess of ripe avocados, the tang of Greek yogurt, the kick of garlic, the zing of lime juice, and the freshness of cilantro, resulting in a delightful and satisfying starter or light lunch.
SERVINGS
4
PREP TIME
15 Mins
COOK TIME
30+ Mins
INGREDIENTS
4 large Perpetual™ long english cucumbers, peeled and diced
2 ripe avocados, peeled and pitted
1 cup Greek yogurt
2 cloves garlic, minced
Juice and zest of 2 limes
1/4 cup fresh cilantro leaves
Salt and pepper to taste
Additional cilantro and avocado slices for garnish (optional)
RECIPE NOTES
You can add a pinch of cayenne pepper or a dash of hot sauce for a bit of heat.
COOKING TIPS
For added freshness, reserve a few cilantro leaves and a drizzle of Greek yogurt to swirl on top of each serving.
PRESENTATION
Present the Cucumber and Avocado Gazpacho in chilled bowls or glasses, garnished with a sprinkle of fresh cilantro leaves and a few creamy avocado slices for a beautiful and inviting presentation.
NUTRITIONAL INFO
Per serving:
Calories: 230
Fat: 15g
Protein: 7g
Carbohydrates: 21g
Fiber: 8g
DIRECTIONS
- Start by preparing the cucumbers. Peel them and dice them into chunks.
- In a blender or food processor, combine the diced cucumbers, peeled and pitted avocados, Greek yogurt, minced garlic, lime juice, lime zest, and fresh cilantro leaves.
- Blend until you achieve a smooth and creamy consistency.
- Taste the gazpacho and season with salt and pepper to your liking. Adjust the lime juice or garlic if needed.
- Transfer the Cucumber and Avocado Gazpacho to a large bowl and chill it in the refrigerator for at least 30 minutes to allow the flavors to meld.
- When ready to serve, ladle the chilled gazpacho into bowls or glasses.
- Garnish with additional cilantro leaves and avocado slices if desired.
EXPLORE MORE RECIPES
PERPETUAL GOODNESS, PACKED WITH FLAVOUR.
Stuffed Pepper Soup
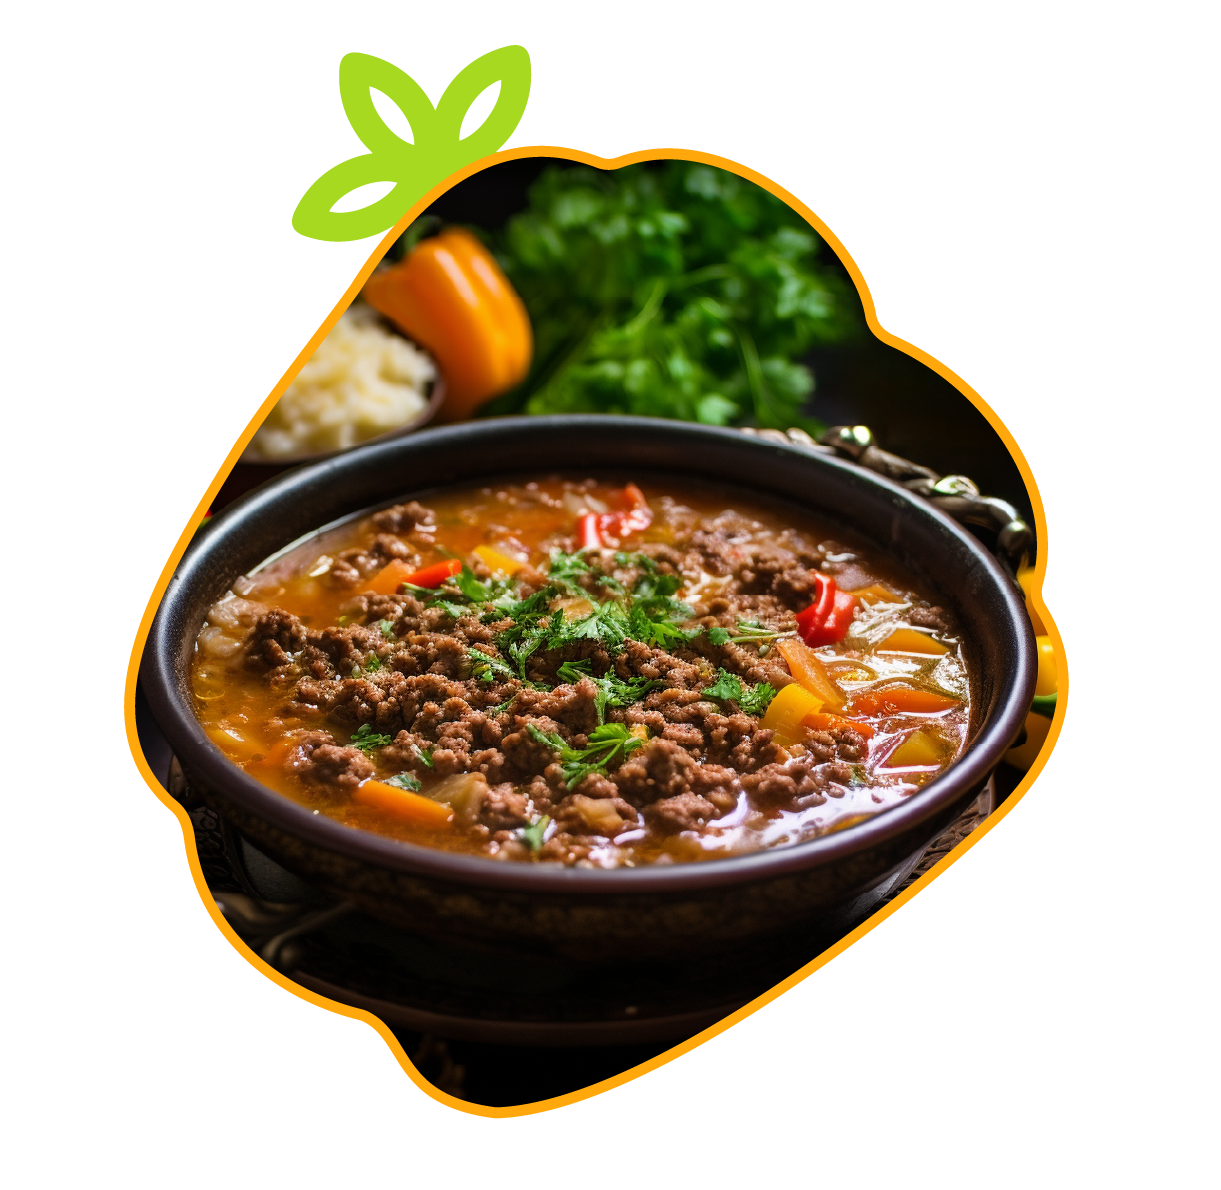


This Stuffed Pepper Soup offers all the comforting flavors of traditional stuffed peppers in a warm and hearty bowl. Diced bell peppers, savory ground beef (or turkey), tender rice, and a medley of aromatic spices come together to create a soul-warming dish that’s perfect for cooler days.
SERVINGS
6
PREP TIME
20 Mins
COOK TIME
25 Mins
INGREDIENTS
1 lb ground beef or ground turkey
2 cups Perpetual™ bell peppers, diced (a mix of red, green, and yellow)
1 cup cooked rice
1 can (14.5 oz) diced tomatoes
1 can (14.5 oz) tomato sauce
4 cups beef or vegetable broth
1 onion, finely chopped
3 cloves garlic, minced
1 teaspoon dried basil
1 teaspoon dried oregano
1/2 teaspoon paprika
Salt and pepper to taste
Fresh parsley for garnish (optional)
RECIPE NOTES
Get creative with your fillings—add sautéed bell peppers and onions, corn, or your favorite taco sauce for extra flavor.
COOKING TIPS
Feel free to customize the soup with your favorite toppings, such as shredded cheese, a dollop of sour cream, or a sprinkle of crushed red pepper flakes for extra heat.
PRESENTATION
Ladle the Stuffed Pepper Soup into bowls and garnish with a sprinkle of fresh parsley for a pop of color and freshness.
NUTRITIONAL INFO
Per serving:
Calories: 290
Fat: 12g
Protein: 20g
Carbohydrates: 25g
Fiber: 3g
DIRECTIONS
- In a large soup pot, brown the ground beef or turkey over medium-high heat, breaking it into crumbles as it cooks. Drain any excess fat.
- Add the chopped onions and minced garlic to the pot. Sauté for about 3-4 minutes, until the onions become translucent.
- Stir in the diced bell peppers and continue to cook for another 3-4 minutes.
- Add the cooked rice, diced tomatoes (with their juices), tomato sauce, beef or vegetable broth, dried basil, dried oregano, paprika, salt, and pepper. Stir to combine.
- Bring the soup to a boil, then reduce the heat to low. Cover and simmer for about 20-25 minutes, allowing the flavors to meld together and the peppers to become tender.
- Taste the soup and adjust the seasoning if needed.
- Serve hot, garnished with fresh parsley if desired.
EXPLORE MORE RECIPES
PERPETUAL GOODNESS, PACKED WITH FLAVOUR.


